
Expert Guide on How To Filter DNS Traffic Using Wireshark
Understanding DNS Filtering in Wireshark
Wireshark is a handy tool for network gurus, allowing us to analyze all the network packets we capture. However, when you want to filter DNS traffic using Wireshark, you can use certain techniques to make your analysis more efficient and effective. This guide will explore 11 ways to filter DNS traffic using Wireshark.
In this article I’ll provide you with real-world examples and screenshots and also real cases in which a DNS analysis was absolutely critical for a network breach analysis.
Filtering all DNS traffic.
For starters, let’s begin with capturing all DNS traffic in Wireshark.
So, how do you filter all DNS traffic to begin with?
Easy.
Begin by opening up Wireshark.
Make sure you let Wireshark listen to the correct network interface.
When Wireshark is opened up, you’ll see a ton of traffic.
For the sake of this article, 99% of the traffic shown is not of our concern.
So, let’s filter the DNS traffic.
We’ll do this by simply entering “DNS” in the Filter field of Wireshark.
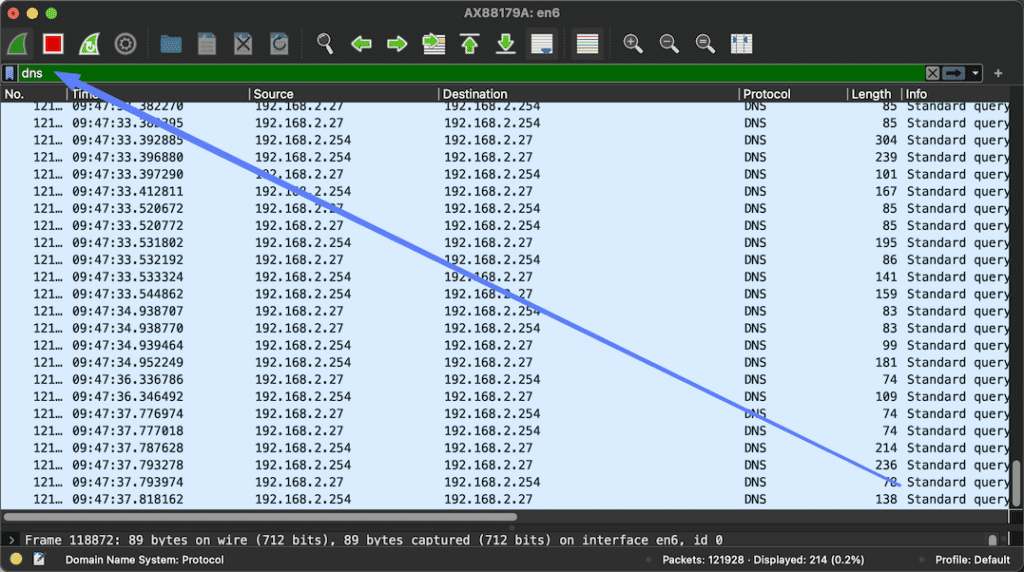
Once you have applied the filter, you will see all DNS packets in the Wireshark capture.
Amazing! But does it help you that much, really?
Probably not.
We really need to dive into the specifics of what we want to filter on.
With only this filter applied, there is simply too much DNS traffic to recognize if there is some kind an issue in the first place.
The difference between an ‘A’ and ‘AAAA’ DNS record.
But first, let’s explain the difference between an A record and an AAAA record.
An ‘A’ record is the most common type of DNS record and it stands for “address”. It’s used to map a domain name to an IPv4 address.
On the other hand, an ‘AAAA’ record is similar to an A record but it maps a domain name to an IPv6 address.
Why is this important for filtering DNS traffic? Well, depending on the network protocol being used and the specific network configuration, there may be a higher likelihood of one type of record being used over the other. For example, if a company’s network is primarily configured for IPv6, then there will likely be more AAAA records in their DNS traffic compared to A records.
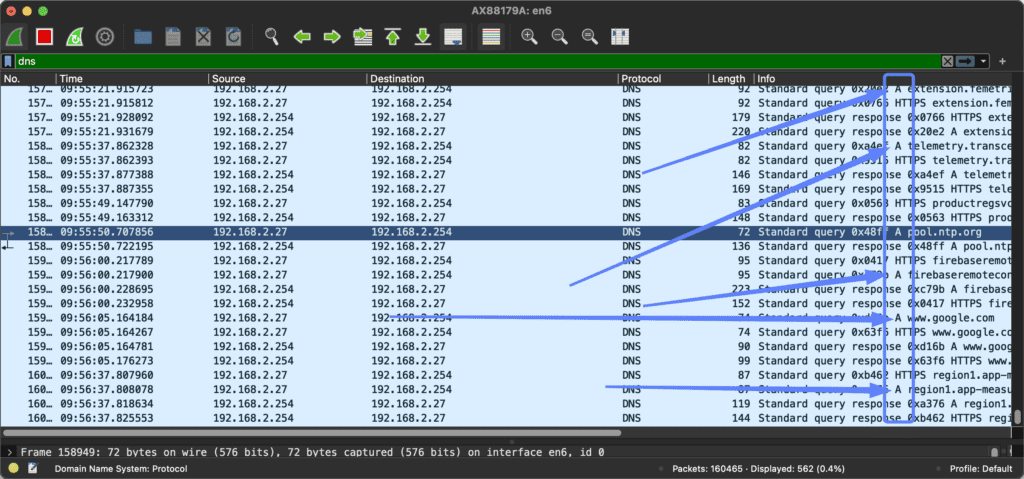
You can easily spot if it’s an A or AAA record in Wireshark.
How to filter on a specific domain name?
Now the good part comes. What if we want to filter on a specific domain name?
For example, let’s say we are experiencing issues with our company’s website and we want to see all DNS traffic related to that specific domain.
Well, it’s simple! In the Wireshark filter field, just enter “dns.qry.name == [desired domain name]”.
This will filter all DNS traffic containing the specified domain name, making it easier to identify any potential issues or unusual activity related to that specific domain.
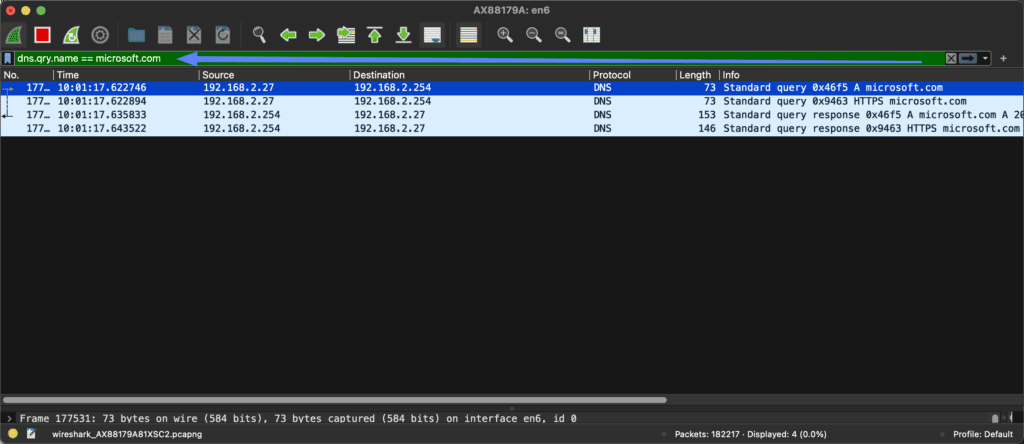
When you apply this filter you get all DNS queries related to that specific domain.
How to filter only on parts of a domain name?
In some cases you want to filter only on a specific part of a domain name, for example all subdomains under a certain main domain.
To do this you must replace the operator of the filter.
Instead of using “==”, you replace this with “contains”.
Now all DNS traffic that contains that part of your filter will be shown.
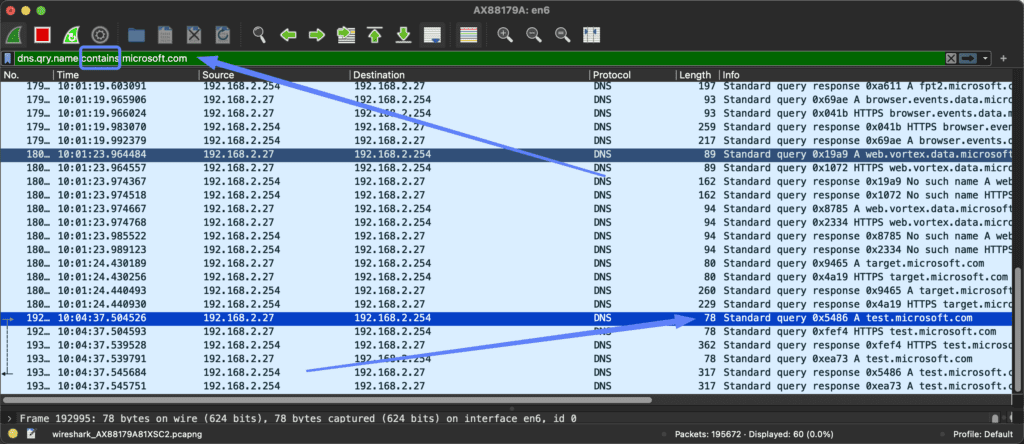
You can do this in situations like wanting to see all subdomains of a certain website, or filtering on specific TLDs (Top Level Domains) like .com or .org.
By utilizing these filter options, you can easily narrow down your DNS traffic analysis and focus on the specific information relevant to your investigation.
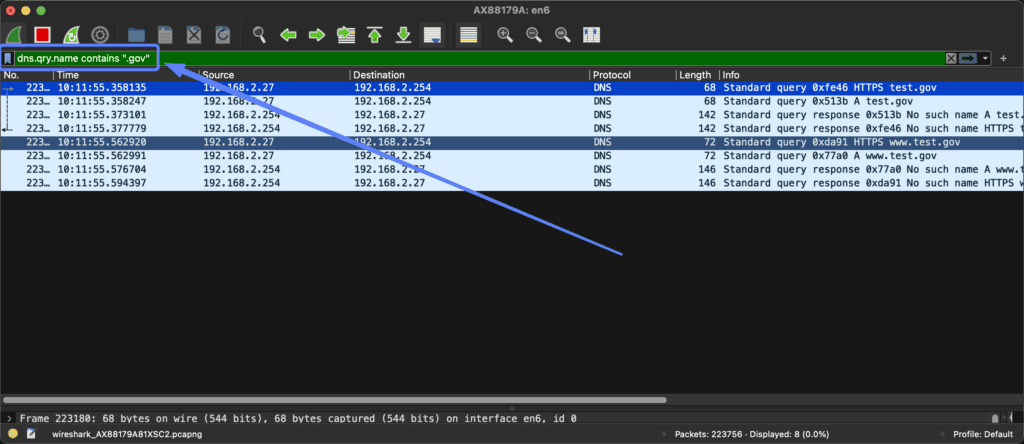
How to filter only on the domain extension?
And that brings us to the following question.
How to filter on a domain extension such as the TLD .com.
We basically use the same operator, but instead of the domain name, we filter on the domain TLD.
A requirement is that the TLD is put into quotes, otherwise Wireshark will not accept it as a filter.
For example, if we only want to see DNS traffic for .gov related sites, we apply the following filter: “dns.qry.name contains “.gov””.
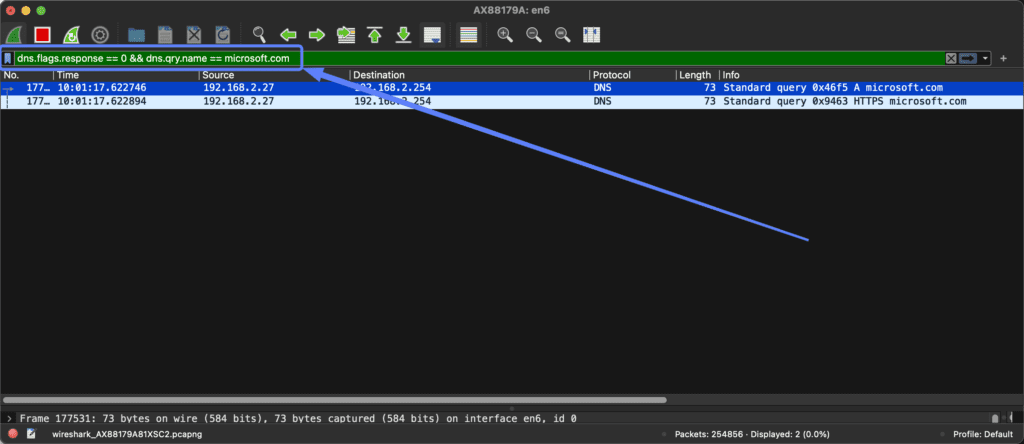
How to filter only on DNS requests?
Well, what if we want to filter only on DNS requests?
And what if we want to combine this for specific domain names?
Again, easy, and I’ll show you exactly how.
First, let’s begin with filtering on DNS requests only.
We use the following filter for that: dns.flags.response == 0.
This tells Wireshark to only show DNS requests.
So let’s say you want to combine that with microsoft.com.
You’ll need the “&&” operator to tell Wireshark to perform and combine both operators at once.
Such a filter would look like this:
“dns.flags.response == 0 && dns.qry.name == microsoft.com”
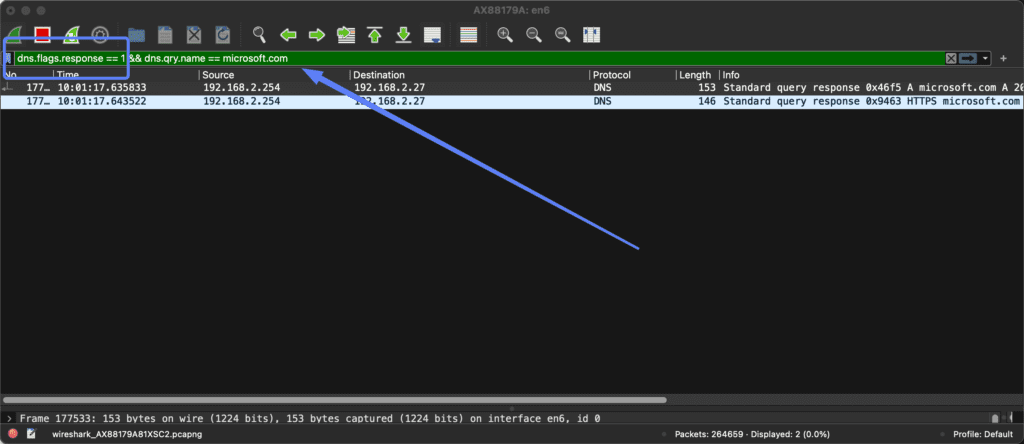
How to filter only on DNS replies?
We can do the same with filtering only on DNS replies.
We do this by changing the dns.flag.response from 0 to 1.
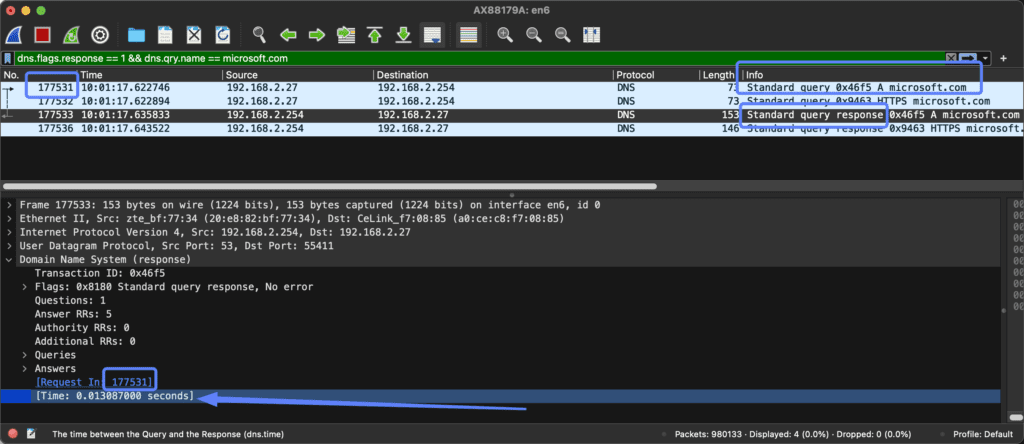
How to measure the latency of DNS traffic?
So, at this point we know how to filter all DNS traffic you want see.
But how do you check and verify the latency of DNS requests and servers?
Imagine that your company is complaining about a slow network.
We may want to verify the latency of your DNS traffic and servers to identify the cause of the issue, which could have multiple origins.
Although it may sound complex and difficult, finding out the latency for a DNS response is actually a straightforward task.
What you need to do is select the DNS packet of the DNS reply / response in Wireshark.
By default at the bottom of your screen you see the packet details.
Within the packet details you need to look at the “Domain Name System (response)” section.
When you look in there you see “Answers” and then “Time”.
This “Time” shows you exactly what your latency is from your DNS server.
In conclusion, understanding how to use Wireshark to filter DNS traffic and measure latency is a critical skill set for anyone responsible for network performance and troubleshooting.
With the steps we’ve outlined, you will be equipped to quickly and effectively drill down into the DNS requests and responses, and gain insights into your network’s DNS latency.
Remember, the process may initially seem hard, but with just a little bit of practice, it becomes second nature. So, keep exploring and learning, because a well-monitored network is the backbone of a smoothly running tech infrastructure.